
Carabiners are one of the most ubiquitous pieces of climbing equipment around. These oddly shaped pieces of aluminum seem to sprout from every climbers harness and backpack like odd little flowers. Knowing a little bit about the different varieties and characteristics of carabiners can be helpful when deciding what you need to have with you for which purpose. So clip in and relax here is my take on the wide world of those snappy thingies.
It can be helpful to understand the parts of the carabiner. There is the spine which is the side opposite the opening. The part that opens is called the gate. It will either be a solid piece that houses a spring inside it or a wire gate. The nose of the carabiner will have a shape that allows for the gate to be captured when the carabiner is loaded and begins to stretch. This has typically been a pin and a notch for it to rest in. Variations now include key locks where the bin is replaced by shaping the metal on both the gate and nose so the two pieces fit forming a wedge.
Wire gate carabiners may be less susceptible to vibrating open during a fall where the motion of the rope running through the carabiner causes the gate to flutter open a small amount. If the carabiner is loaded with the force of a lead fall at that exact moment it can possibly fail. Unless the spring on a solid gate carabiner has become weak or excessively dirty this is a very rare phenomenon. The wire gate design can be less prone to freezing though which is nice for activities such as ice climbing and mountaineering. They can be lighter as well in general. Other considerations for the nose of the carabiner can be how clean it is with regard to clipping. Key lock carabiners are less prone to snag on a wire of a stopper or the edge of a bolt hanger. Some wire gate carabiners are also designed in such a way that there is less chance of the nose becoming snagged while clipping or unclipping.
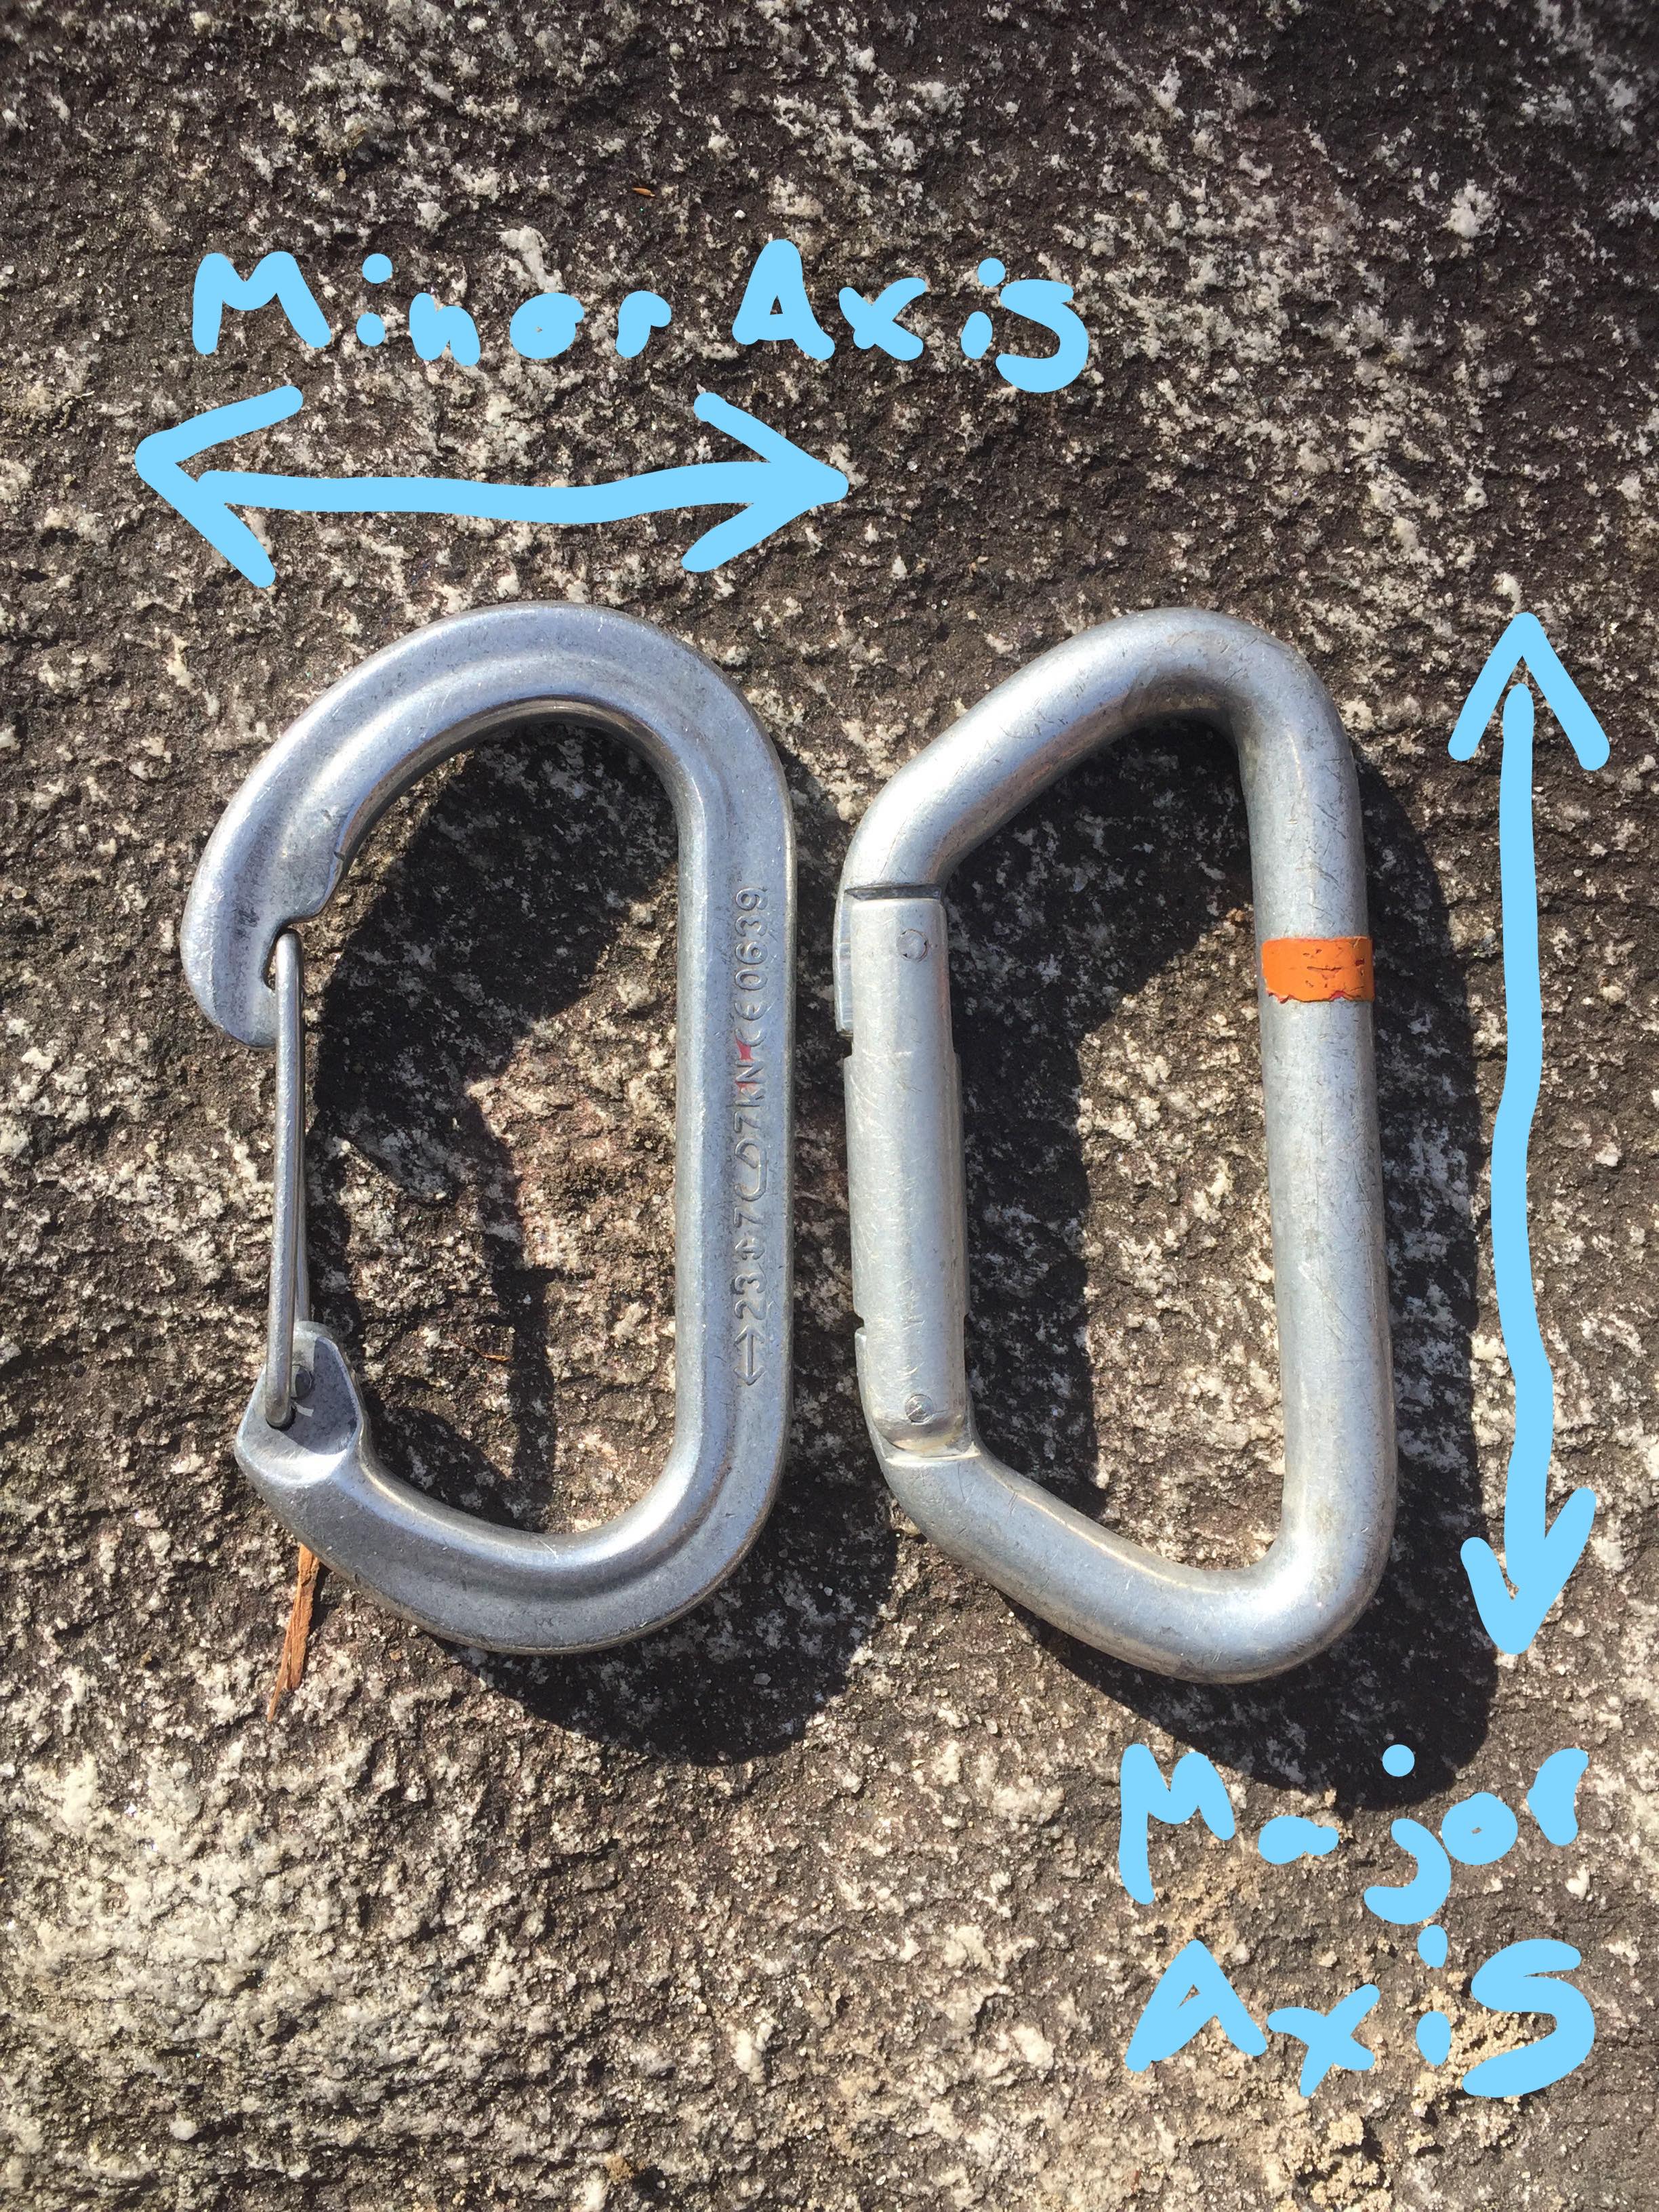 Carabiners are described as having a major axis and a minor axis. The major axis is along the spine and is how the carabiner is generally intended to be loaded. The minor axis is the span between the gate and the spine. Carabiners are stamped with strength markings that indicate major axis, minor axis, and gate open strengths. These are marked with the kN symbol which indicates strength in kilonewtons. One kilonewton when converted to a static load strength is approximately 224 pounds. Climbing carabiners are engineered to handle the loads commonly experienced while engaged in climbing activities. DO NOT go out and get carabiner like items from the hardware store and bring them out to a climbing site! Also if you have non-climbing type key chain carabiners around, never let these get mixed into your climbing equipment.
Some things to consider will be weight versus durability. If you are just getting started and want some workhorse carabiners, lean towards buying ones made of thicker stock as opposed to the smallest and lightest. They will last longer before getting notched out by the rope. Once your carabiners start to show significant notching, go ahead and toss them. While they might still be strong enough for the loads you subject them to the other serious concern will be the new edge radius that has been created by the missing metal and that new edge could be dangerous for your rope. I will also mention steel carabiners. These critters are massively strong and durable but they will feel like small bricks in your pack and will set you back a good bit more price wise. Unless you really just want the longest lasting carabiners for mega top rope sessions year after year, you probably have no need for the steelies.
Locking carabiners are not necessarily stronger than non-locking ones. Again the strength is determined by thickness of stock used, shape, etc. The point of locking carabiners as that they keep the gate from accidentally opening during critical applications such as while belaying or while the rope is running through a top rope anchor.
Shape: There are a few basic categories of shape with tons of variations on each.
Ovals: One of the oldest varieties is the Oval. Ovals are useful due to their symmetry. You can pair two in the opposite and opposed configuration and have a nice secure combination where the spine of one acts to guard the gate of the other from being accidentally pushed open. They are also useful when using pulleys or aiders when you want the load to rest in the middle and not shift around as much. While these have become somewhat less popular among climbers I would say they are still worth keeping a few around. The shape is handy for racking equipment like a set of wired nuts or a few tricams.
D-shaped: This shape came about in search of increasing the strength of the carabiner by shifting the load closer to the spine.
Modified/ Asymmetrical D: These are D’s that have been stretched out to increase the gate opening or gate clearance. This helps when trying to clip ropes one handed as when leading a climb.
 Pear or HMS: These locking carabiners are generally sized to handle two strands of rope such as when belaying with double ropes or rapelling with two strands. They also allow for building a munter hitch. By having a larger rounded section they also are a good choice for a clove hitch. This combination is a common way for climbers to anchor themselves at the belay station using the rope on multi-pitch climbs.
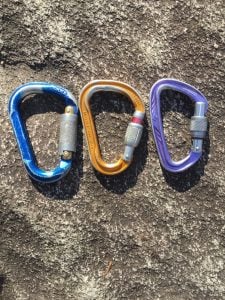
The blue and orange carabiners on the image above are examples of pears. The first has an autolocking gate and the middle has a screw gate. The purple carabiner on the right is an asymmetrical D with a screw gate. Autolocking gates can be handy in that you may be less likely to forget to lock it but the down side is they cannot be clipped one handed which means when attaching the rope or tying hitches like the clove or munter you will need to have two hands free.
Marking your carabiners is a great idea if you plan to go out and share equipment with friends. Some electrical tape can work or another option I have liked is automobile pin striping that you can find from auto part stores. It is narrower in width than electrical tape, cheap, and durable. Nail polish is also a popular option.
As always your safety is your responsibility, be sure to get quality instruction before selecting equipment and using it.
There are many great threads and posts on this topic. Check out the following links for more great reading. Check out some of the great resources at www.blackdiamondequipment.com and www.petzl.com for info about their products. For tips and resources you can also visit the American Mountain Guides Association web page www.amga.com and look at the Tech Videos section. Feel free to visit us at Fox Mountain Guides www.foxmountainguides.com as well for info on courses and instruction.
Happy Climbing.


