How do I get started? Where do I go? Do I need a new bike? All of these questions, and then some, answered by our bikepacking experts Logan Watts, founder of bikepacking.com, and Stephen Proffitt, product manager for Shenandoah Bicycle Company.
Tips
#1 Ask yourself—What do you want out of this experience?
For Shenandoah Bicycle Company’s Stephen Proffitt, the answer to this question is essential. Some people may want to do long distances, go light, and ride fast, while others may want to enjoy the journey, tackle fewer miles, and never leave the security of their backyard. And that’s okay. Before you start wracking up thousands of dollars on your credit card, Proffitt says to stop, think, and listen, not to the sales person pitching the latest Revelate bag, but to yourself.
“Bike people often say, ‘Well, this is what I’d do,’ or ‘This is what you want,’ and that’s so aggressive to a customer,” Proffitt says. “The real question is, ‘Hey, what are you looking to get out of this experience? What are your goals?’ Bikepacking is basically the hiking of the bike world. There are super big nerds out there who want the lightest setup, but at its heart, it’s using existing gear and trying to strap it to your bike in awesome ways.”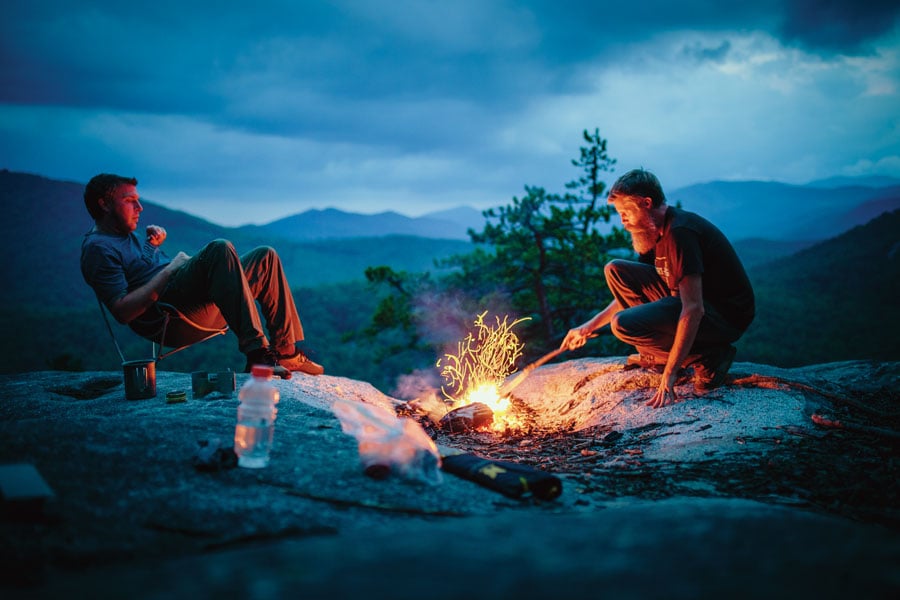 #2 Just go do it.
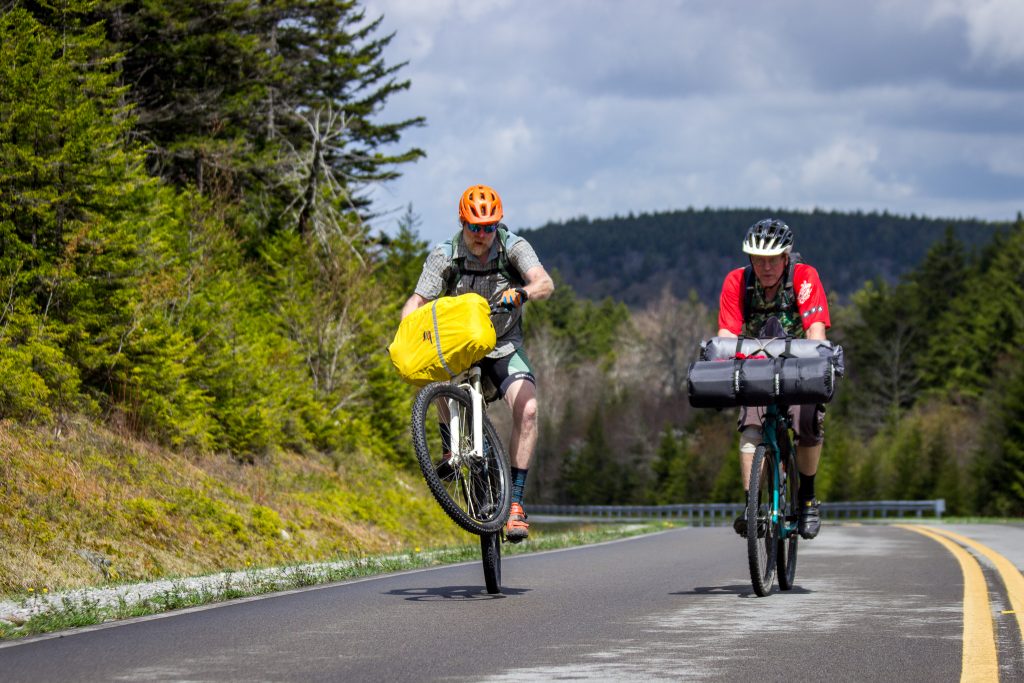
“You don’t really need a lot of stuff to do it,” says bikepacking.com founder Logan Watts. “You just need to go do it.”
If that requires shedding gear as you ride, which Watts and his wife found themselves doing during their first long-distance ride from Mexico to Panama, that’s fine. Over time, you’ll refine your setup, Watts says, but don’t worry about getting it right your first go.
“The best adventure, your first adventure, should be to just load up everything you think you need in a backpack for one night, fill your water bottle holders, get on your bike and ride,” adds Proffitt. “When you go home, lay out the things you didn’t touch and next time, don’t bring them.”
#3 Keep it simple.
While month-long journeys across the Ugandan countryside certainly sound, and are, epic by default, that doesn’t mean you have to tackle a big escapade in order to have a good time. In fact, Watts says, long weekend trips could be all you need to satisfy your itch.
“I always tell people some of the best adventures can be found right in your backyard,” Watts says. “Just a few months ago, [my wife and I] were temporarily living outside of Raleigh. In that part of eastern North Carolina, there’s nothing. No mountain bike trails. No mountains.”
So one week, Watts decided to craft an overnighter to cure his wanderlust. Less than an hour away, he landed on Croatan National Forest off the coast of North Carolina. He laid out his route, hit rubber to road. And the result?
“It was amazing. I found this perfect camp spot on the beach.”
Moral of the story? Adventure is closer at hand, and simpler to achieve, than you may be inclined to believe.
#4 Get creative.
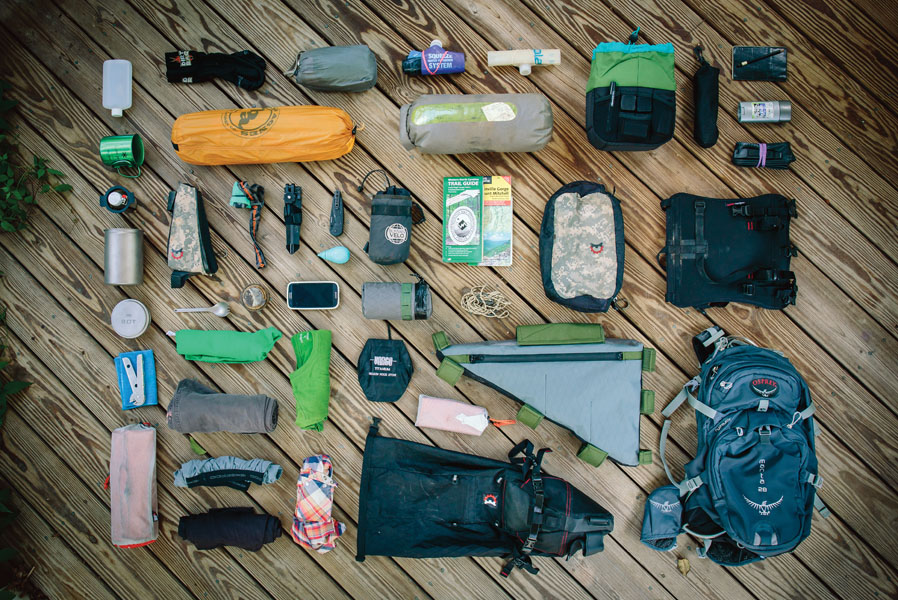
And if you’re not the creative type, consult YouTube, Pinterest, or any number of bikepacking forums (bikepacking.com even has a section purely designated for cheap, DIY bikepacking “hacks”). Learn to make a shelter out of a Wal-Mart tarp and the bike you already own. Rig a seat post bag without dropping $200. The Internet as a resource is a beautiful thing. Use it.
#5 Remember that no one setup is the right setup.
What may work for your ultralight guru of a friend may be completely unrealistic for you. Totally normal. Unlike traditional team sports, bikepacking is an individual endeavor, even when riding in groups.
“At its heart, all of this is somewhat grassroots,” Proffitt says about bikepacking. “You’re going to have the things that work for you and your personality and your packing style. Some people don’t bring a tent. Other people aren’t going to be able to function like that. If you require bringing a trailer to bring all of your things the first time, that’s fine.”
The point is to have fun with it and experiment. You can’t really go wrong.
Tricks
#1 Use electrical tape.
So your fork doesn’t have any water bottle mounts? Big deal. Grab a couple rolls of electrical tape and some water bottle cages and tape away. Be sure to tape an extra tube somewhere on your bike. The best part about electrical tape is that it doesn’t leave any residue when you remove it. Plus, you can get some super funky colors. Style is everything, even when using electrical tape.
#2 Invest in dry bags.
If there’s one thing you should buy right off the bat, it’s a couple of heavy-duty dry bags. More important than being able to strap everything to your bike is that your gear also stays dry. Plus, dry bags are inherently easy to attach to any bike. Just cinch them down with a couple of straps to the handlebar, or loop the clip upside down under the seat post and strap tight.
#3 Love Tyvek.
If you don’t love and use Tyvek already, you should. Ground cloth, bivy, heck I’ve even seen a guy rocking a Tyvek kilt before. It’s versatile, it’s durable, it’s lightweight, it’s packable, and most importantly, it’s cheap.
#4 Make every inch count.
Size does matter. Eventually you’re not going to want to ride technical singletrack with a heavy pack strapped to your back. As you hone your packing system, look to the bike itself for storing supplies. That empty triangle in the middle of your bike can hold an amazing amount of stuff. Bikepacking.com has instructions for a DIY frame bag (for the crafty and cheap), but you can also purchase a half size or full frame bag for around $100.
#5 Think “multipurpose.”
This is where it really starts to get fun. Can you go without, say, tent poles, by using your bike’s handlebars to stake out the fly? Can your tire pump still function if you wrap a bunch of gorilla tape around it for emergencies (that stuff fixes everything)? The lighter you can go, the better those climbs are going to feel.
Oh, and bring latex gloves. You might not necessarily come across a bloody limb, but you probably will encounter a broken chain. Keep those paws clean.
“I often get made fun of for doing so, but it’s something I’ve learned commuting by bicycle over the years,” says Proffitt. “Nice clothes and greasy hands aren’t friends.”
Trips
• Travel in company and learn the basics of bikepacking with Shenandoah Bicycle Company! Upcoming bike campout: October 22-23
• Get schooled in backcountry bikepacking clinic-style with Mulberry Gap’s seasoned guides. This north Georgia-based biking facility offers four-day Cohutta Backcountry Bikepacking 101 and 201 courses in the spring and summer ($100 each) for intermediate riders looking to get some helpful pointers on everything from packing to route planning. Or check out Mulberry Gap’s two-part, guided tour of the Trans North Georgia September 18-26. Visit mulberrygap.com for more information!
Birthplace of Rivers National Monument
Marlinton, W.Va.
Distance: 58.8 miles
Difficulty (1-10): 4
Type: Loop/overnighter
Terrain: 50 percent gravel, 50 percent paved
Highlights: Ramp season, riverside riding, shelter camping, mountain views
Directions: http://bit.ly/CranberryWilderness
Two Gorges Gravel
Morganton, N.C.
Distance: 75 miles
Difficulty (1-10): 4
Type: Loop/overnighter
Terrain: 55 percent unpaved, no singletrack
Highlights: Expansive scenery of Linville Gorge, timing the ride with rhododendron-in-bloom, a 20-mile gravel descent (f’real), Wilson Creek’s wilderness feel and stunning landscape
Directions: http://bit.ly/TwoGorgesGravel
Slate Springs
Harrisonburg, Va.
Distance: 52 miles
Difficulty (1-10): 4
Type: Loop/overnighter
Terrain: 75 percent gravel, 25 percent paved
Highlights: Meadow Knob camping, Reddish Knob descent, ample spring access and wildlife viewing
Directions: http://bit.ly/SlateSprings
Iron Mountain Trail
Damascus, Va.
Distance: 43 miles
Difficulty (1-10): 5
Type: Loop/overnighter
Terrain: 50 percent paved, 50 percent singletrack
Highlights: 6-mile long downhill, shelter camping, creek crossings, rock gardens, classic Appalachian green tunnel
Directions: http://bit.ly/IronMTNTrail or http://bit.ly/IronMTN100 for singletrack only (51.4 miles; route of Iron Mountain 100K)
The Appalachian (Beer) Trail
Pisgah National Forest, N.C.
Distance: 108 miles
Difficulty (1-10): 7
Type: One-way/four-day minimum
Terrain: 50 percent unpaved, 50 percent singletrack
Highlights: Ultimate tour-de-western-North-Carolina for craft beer and singletrack both, Black Mountain Trail’s epic downhill, Slate Rock overlook
Directions: http://bit.ly/AppBeerTrail
Trans North Georgia
South Carolina to Alabama
Distance: 342 miles
Difficulty (1-10): 7.5
Type: One-way/five-day minimum, seven-day average
Terrain: 72 percent unpaved, 18 percent singletrack, little paved
Highlights: Solitude, waterfall and creekside riding, Cohutta Mountain views, Stanley Gap and Bear Creek singletrack, rest and reprieve at Mulberry Gap Mountain Bike Getaway at mile 220
Directions: http://bit.ly/TransNGA
Go-To Gear
It’s safe to say Logan Watts has spent more time on a bike than in a car since he and his wife sold their belongings and hit the road in 2012. A native of Winston-Salem, N.C., Watts has ridden from Mexico to Panama, and in Uganda, Rwanda, South Africa, Morocco, Southern Spain, and that’s just the start of the list. Watts sometimes posts up in Brevard, N.C., but mostly, he’s still chasing bikepacking routes around the world. His gear recommendations are tried and true. Check out a few of his favorites below!
“If anything is better than duct tape, it is the Voilé Strap.” Ranging in size from 15 inches to 32, these polyurethane straps are typically used by skiers, but their functionality extends well beyond holding your skis together or crafting an A-frame on your pack.
Salsa Anything Cage & Bag ($30; $32)
Anything goes with this cage and bag combo. Designed for riders looking to attach everything from lightweight gear items like sleeping pads and dry bags to large water bottles and Gatorade jugs, this unconventional bike rack gives you the ability to make every inch count.
Oveja Negra Snack Pack ($45-55)
Now available in an XL size, this top tube bag is the perfect solution for storing caloric fuel, spare tubes, tools, the latest and greatest (and biggest) iPhone on the market. It even fits a pint of Ben and Jerry’s ice cream. We tested it ourselves.
Revelate Designs Handle Bar Harness ($75)
Already have an ample supply of durable dry bags? Pop ‘em in a handle bar harness and hit the trail! This harness accommodates dry bags up to 20 liters in size and even works on drop bars. Tents, sleeping systems, packrafts, mini kegs. Whatever your need, this harness can hold it.
Oveja Negra Super Wedgie Frame Bag ($90-100)
Utilize the space beneath your top tube without compromising the accessibility of a seat tube water bottle cage. The Super Wedgie comes in small (4+ liters) and large (6+ liters) sizes to fit whatever ride you’re rockin. Complete with a hydration/wire port and a separate map pocket, this bag will accommodate the needs of multi-day excursions, long day trips, and everything in between.
Revelate Designs Sweetroll Handlebar Bag ($100)
100 percent waterproof and customizable, these handlebar bags come in small, medium, and large sizes for every type of load, bike, and trip.
Made with upcycled nylon, this seat pack is not only one-of-a-kind but also eco friendly. The Hauler provides all of the room you need to lug your camping gear, but can also be converted into a messenger bag for bikepackers who use their bikes for commuting.
Acre Hauser 14L Weatherproof Hydration Pack ($215)
Whatever the weather, this little ditty can handle the heat (or rain, sleet, snow, hail, crushing wind, etc.). Count on this totally sealed pack to keep everything dry on the inside while still allowing your back to breathe with the help of perforated panels and shoulder straps.