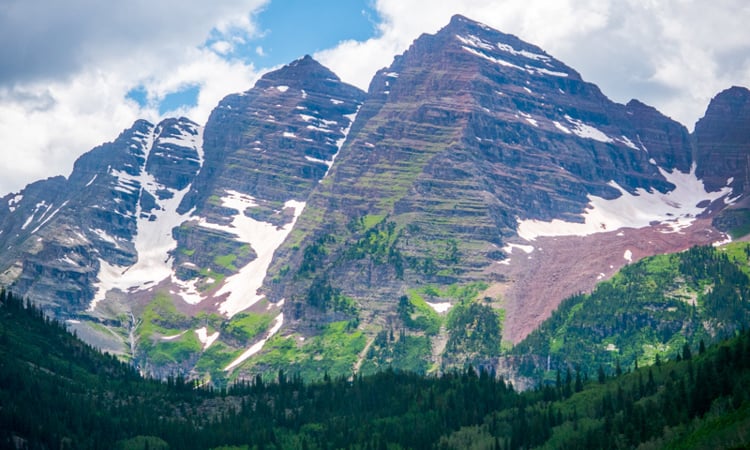
The Four Pass Loop in Maroon Bells-Snowmass Wilderness area just outside of Aspen, Colorado, is one of those backpacking trips that you consistently find on online lists that read “Five Backpacking Trips You Must Do Before You Die“. Chances are, you’ve even seen a photo of the Maroon Bells. With their beautiful red rock towering over Maroon Lake, this location has to be one of the most circulated photos from Colorado on the internet. In fact, it’s been unofficially deemed the most photographed spot in Colorado. The truth of the matter is – this is all for good reason. This area of Colorado is absolutely stunning. We have visited and backpacked this area several times. We recently even took Roxy’s two-year-old niece on her very first backpacking trip here. With relatively easy access, this area sees a lot of traffic. But with proper planning and some good beta, you can dodge the crowds, find epic camping spots, and enjoy some of the most beautiful scenery this country has to offer. We wanted to detail what we think is a great way to tackle the Four Pass Loop in a four day and three-night adventure.


With this trail, it’s a good idea to acclimate yourself. You will often see this trail listed as intermediate. This might be true for a seasoned backpacker, but if you spend your time at sea level, this trip can easily become a nightmare. We’ve seen many people turn back due to being either unprepared or unfit. The Four Pass Loop will take you on a 27-mile loop with roughly 8,000 feet in elevation gain.
Due to the popularity of the area, drive-in access to Maroon Lake (where your journey starts) is limited to buses that run to and from Aspen Highlands Ski Area. The ticket is $8 per adult and you will enjoy a short and informative bus ride to the trailhead. If you get there early or late enough, you may drive your car to the overnight lot at the trailhead. The catch is that this lot is often full and you run the risk of having to drive back out and wait for a bus anyway. However, starting early will guarantee you good camping and that you’ll be up and over any of the four passes over 12,000 feet and down to safety before the afternoon thunderstorms.
Day 1:
Maroon Lake is where most of the crowds hang out. The view is incredible though and it’s easy to see why people flock there for a photo opportunity. As you follow the trail around Maroon Lake the trail ascends roughly up 1.5 miles up to Crater Lake. Here you’ll find 11 first-come-first-serve campsites that make a great base camp for those looking to tackle North Maroon Peak. For this trip, you’ll keep hiking past these campsites, up towards West Maroon Pass. We recommend doing this hike clockwise. Doing this hike counter clockwise is arguably more scenic, but hiking up and over Buckskin Pass with a full pack will be a tough task. We recommend going left at the fork in the trail (before reaching Crater Lake) and head up towards West Maroon Pass. Once you ascend into the trees past the lake, there is a variety of good camping ranging from shaded spots near the water or open-air spots right at the tree line. We opted to go further on the first day and camp near the treeline.


Day 2:
This is where you really start to feel like you are in the backcountry. On day 2 you will conquer two of the famous four passes. West Maroon Pass (12,480 ft) and Fridged Air Pass (12,415) are your objectives. Between these two passes, you never drop below treeline and camping can be a bit tricky. There are magnificent campsites in the trees below treeline in the valley behind Fridged Air Pass. We recommend hiking all the way to into Fravert Basin and camping by the water. Most hikers stop for the day before they make the descent and we found what was our favorite spot of the trip. It was here that we surprised a moose and caused it to mock-charge us. Always be aware of wildlife while on this trail. Moose and bear activity is high in this area.


Day 3:
On the third day, you’ll be conquering Trail Rider Pass. This one is a challenging climb, with a view that makes all the climbing worth it. Once on top of the pass, you can see the beautiful Snowmass Lake and the basin you will be hiking into laid out in front of you. Descend to the other side with a smile. When we did this hike we had a soggy day with lots of rain, but the views held and we were happy campers. Once again you have the opportunity to camp in some nice tree covered camping on the other side of the pass. We found what seemed like a perfect spot, but after having some lunch we realized we were actually surrounded by lots of fresh moose poop. The last thing we wanted was to wake up to a bunch of moose walking through camp in the morning on their way to get a drink. We moved further down the trail and found a delightful spot on the edge of the water once again. Some choose to camp AT Snowmass lake but we chose to keep going in order to keep the hike out the next day relaxed.

Day 4: On your final day you have the least amount of elevation to gain. The hike up the back of Buckskin Pass is a welcome change of pace. Your legs will be happy when you reach the final pass of your trek. The truth is, however, that this final descent back to Crater Lake and ultimately back the Trailhead is a bit brutal. On your way back to the car you can think back to the individual uniqueness of each pass that you have covered. The entire hike takes place in the same mountain range but the landscape over each pass is distinct.

Worth Noting:
1. This area has high bear activity and the use of Bear Canisters are required.
2. Please properly bury your poop and pack out your toilet paper. This area is heavily used and we saw way too much toilet paper just off the trail.
3. Carry a map. While this loop is fairly straightforward, we encountered many lost hikers in our time on the loop. National Geographic makes a map called “Colorado Backpacking Loops South” that this loop is included in — super helpful!
4. Self-registered permits are required in Marron Bells Snowmass Wilderness. You can get the permit in the box on your way to Crater Lake.
5. Hike in July. The wildflowers are out in full force and we’ve never seen anything like it.
Send any questions our way! We love this hike and encourage everyone to experience its beauty.


There is one way for this tour to be a reality, our sponsors! Sending a thank you shout out to our title sponsor Nite Ize, and all of our other awesome sponsors that make this happen: Crazy Creek, National Geographic, Sea to Summit, Mountain House, Lowe Alpine, Old Town, Leki, HydraPak, UCO Gear and Wenzel. If you like the gear that keeps us groovin’ click here to enter for a chance to win


